Quick Start
Follow the steps in this section to install Toon Kit 2 in your project.
Get started quickly with the default material settings, then set up the global lighting settings, and then make Toon Kit 2 your own.
Installing Toon Kit 2
You can acquire Toon Kit 2 by licensing it on the Unity Asset Store, then importing it to your project like any other Unity asset.
After you install Toon Kit 2, a new Toon Kit 2 folder appears in your project. Toon Kit 2 is a UPM-style package, so it will automatically import to a new directory: Packages/Toon Kit 2/~.
Make a Toon Kit 2 Material
To create a new Material, use Assets->Create->Material from the main menu or the Project View context menu.
Use the Shader dropdown to change the material's shader to the OccaSoftware -> Toon Kit 2 -> Toon Kit 2 Shader.
Apply the Material
Simply drag and drop the material to your object or select it from the material slot.
Configure Global Lighting Settings
Toon Kit 2 enables you to configure global settings for the ambient light color and shadow strength for all Toon Kit 2 materials in your scene.
First, you need to add the Toon Kit 2 Manager component to any GameObject in your scene. Toon Kit 2 expects only one Toon Kit 2 Manager in a given scene.
Once you have added the component, you can now customize the global settings.
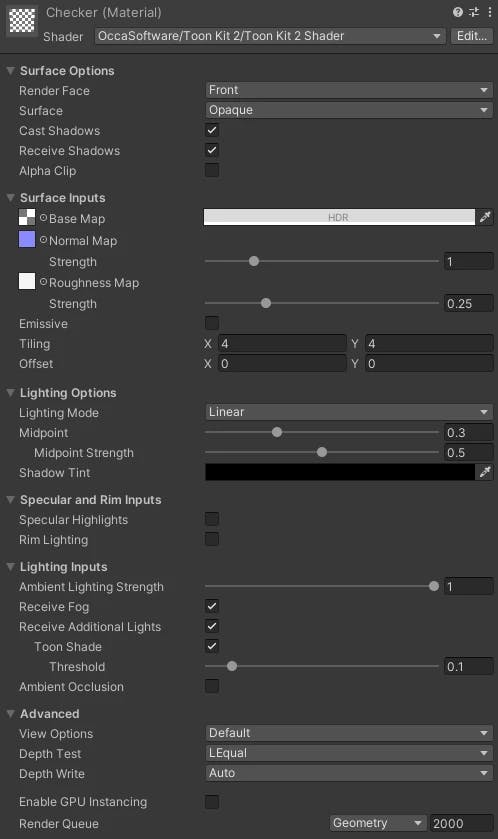
Configure your Toon Kit 2 Material
You can now configure your Toon Kit 2 material(s). You can create any number of Toon Kit 2 materials in your project.
You configure the Toon Kit 2 materials the same way that you configure any other material in Unity. Simply open the material in the inspector, then set the options you want.
To provide the best user experience, some options are hidden when a parent option is disabled.