Get Started
This article will describe how to get started with our Altos package for Unity URP. In this guide, we will install Altos and enable it in your scene.
Install Altos
- Download Altos (opens in a new tab).
- Import to Unity.
When you import Altos to your project, you will see a new directory in your Packages folder: /Packages/Altos/.
Quick Start
- Add Altos Render Feature
- Create Sky Director
- Add WeatherMap
Add the Altos Render Feature
You must add the Altos Render Feature to your Scriptable Render Pipeline. Here's how:
- Click on your Universal Renderer Data in your Project window.
- Click Add Renderer Feature.
- Choose Altos.
You do not need to configure the Renderer Feature.
Create the Altos Sky Director
To use Altos in a scene, you need to create a Sky Director. Here's how:
- In your menu bar, click GameObject > Altos > Sky Director.
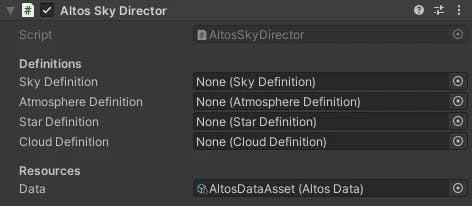
Altos creates a new Sky Director GameObject in your scene.
Altos creates all the Definition configuration files that you need. These are colocated with your Scene in your Project window.
Altos also instantiates two children objects: the Sun and the Moon. These are set up with reasonable default settings. These are the default Sky Objects that Altos builds when you create a new Sky Director. (You can use as many Sky Objects as you want in a Scene.)

Add the Volumetric Cloud component
You must add a WeatherMap component to an object in your scene to instantiate the volumetric cloud map. Here's how:
- In your menu bar, click GameObject > Create Empty.
- Select the new Game Object in the Hierarchy window.
- Click Add Component > WeatherMap.
Set up your pre-transparency pass
Altos renders the clouds behind transparent objects. Therefore, Transparent objects always render in front of Altos clouds. Sometimes, you want to transparent objects behind clouds. For example, you will want to render the Aurora VFX behind the Altos clouds.
In this example, we will use the "TransparentFX" layer. However, you can use your own custom layer if you choose to do so.
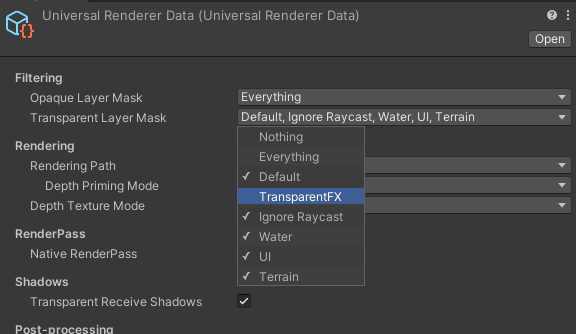
Set up your Filtering Options
- Open your Universal Renderer Data.
- In your Filtering: Transparent Layer Mask, remove the "TransparentFX" layer.
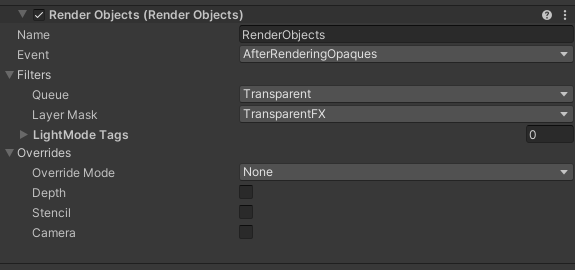
Configure your Render Objects feature
- Add a Render Objects feature to your Universal Renderer Data.
- Set the Event to "After Rendering Opaques."
- Set the Queue to "Transparent."
- Set the Layer Mask to "TransparentFX."
Configure your Game Object
- Set the Layer Mask on your Aurora to "TransparentFX."
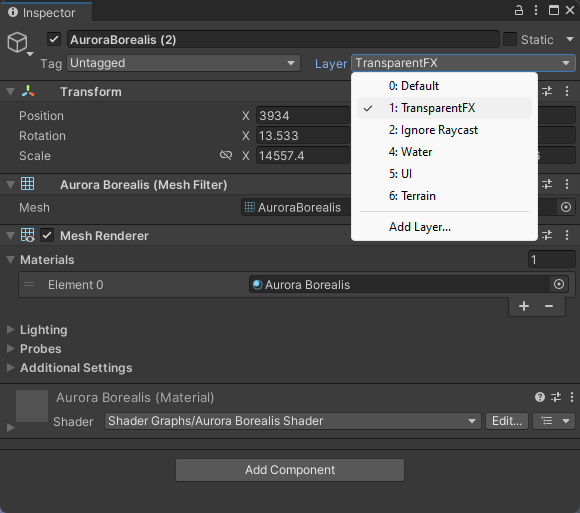
Your Aurora VFX will now render behind the Volumetric Clouds. To render any Transparent material behind the clouds, assign it to the "TransparentFX" layer mask.
Configure and Use Altos
Altos is now installed and enabled in your project.
You can configure each Definition file. You can re-use Definition files in different scenes. Or, you can use unique Definition files in each scene. Configure these Definitions to fit your project's requirements and look goals.
You can also configure the Sun and Moon Sky Objects or add more Sky Objects.
In a separate article, we will review on each aspect of Altos in more detail.